

Search
Use this section to help customers find the products they're looking for.

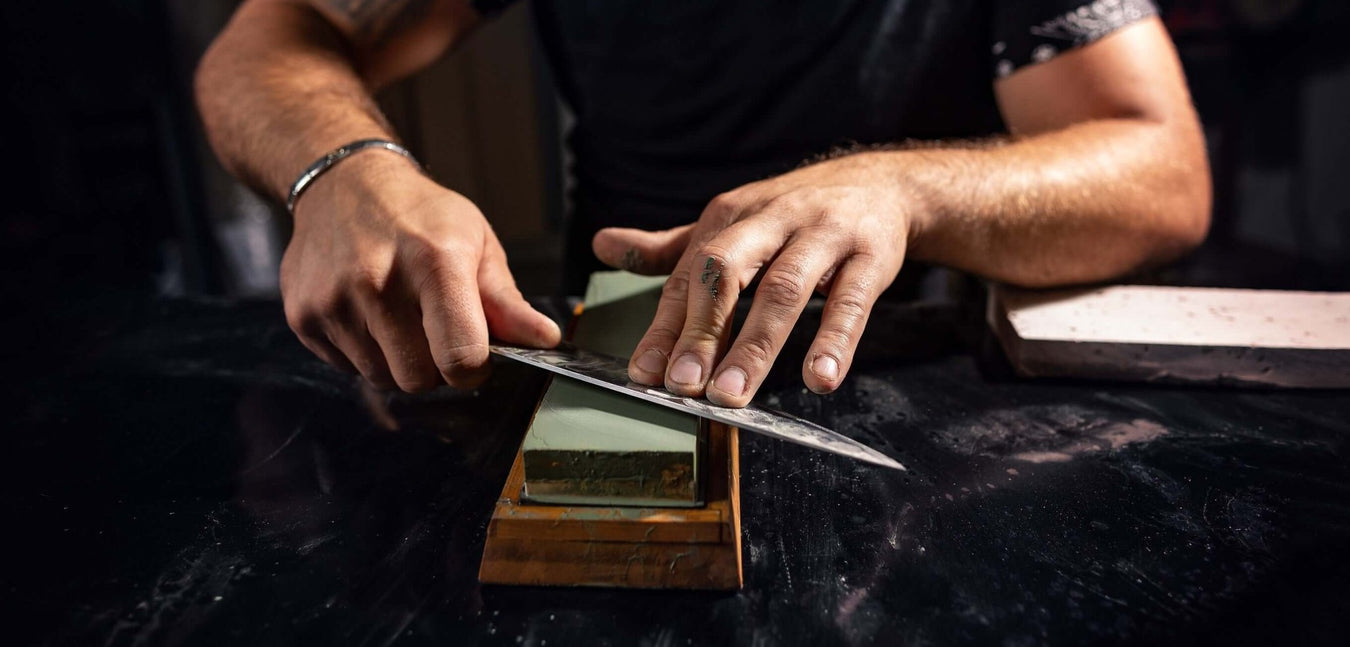
In this blog, we will delve into the basic techniques of sharpening knives on traditional whetstones. Whether you are looking at sharpening your Japanese knives, your traditional kitchen knives, or even outdoor knives, this blog is constantly updated to provide you with an up-to-date overview featuring valuable tips and tricks that will ensure your blades become and stay razor-sharp in 2024.
You can view our variety of stones available: Sharpening Stone Collection.
For kitchen knife repairs or sharpening thicker outdoor knives, we recommend using grits ranging from #200 to #800 for their abrasive and quick grinding power.
Move on to grits between #800 and #2000 for a balanced sharpening that won't remove excessive material.
Finally, the higher grits, from #2000 to #10000+, are reserved for the final polishing. It's worth noting that while carbon steel blades benefit from the extra polishing, we typically see no added value exceeding #3000 on stainless steel knives.
Keep in mind that most stones must be soaked in water for 10-15 minutes prior to being used. However, some latest models on the market are called "Splash-and-go," which saves you that headache and should never be left soaking in water.

Keep in mind that a more aggressive edge (lower angle) requires harder steel to maintain sharpness. While using an angle guide can be common in some user-guides, you can also use everyday items found at home like dollars/coins to achieve the desired angle.
We found that using 5x 1 CAD dollars will give an approximate 15-degree angle on a chef's knife, and 6x 1 CAD dollars will give you closer to a 20-degree angle.

That being said, while precise angles sound great and professional, focus on maintaining a steady angle rather than obsessing over minor degree differences, as a properly held 20-degree angle can be sharper than an uneven 12-degree angle.
Watch out for red fingertips, as this could indicate excessive force. Remember that finding the optimal pressure is a personal preference, and experimentation is key to discovering what works best for you.


If you created a Sharpie line earlier, you can reference back to it and see if your sharpening is even before you move to the second side.
Maintain a consistent stroke count to avoid creating an uneven cutting edge.

As a quick trick, some will even use an edge forward movement in full strokes on their polishing stone to provide an optimal polishing and deburring of the edge. Here once again, keeping a steady angle is key.

Refer to our leather stropping guide for more detailed information on this essential step.

To verify if your knife has been adequately sharpened, you can utilize the well-known paper-cutting trick or test its performance in the kitchen. Ultimately, as the one familiar with how your knife performed when it was new, you are the best judge of your own work.

Lastly, before you store away your sharpening and polishing stones, be sure to maintain them as well so that they remain flat and smooth. Once your stones start to cave in, they will lose their effectiveness and will need to be replaced. To prevent them from degrading, use a flattening stone or flattening powder at the end of every few knives sharpened to clean and flatten your stones. Then, let them dry and store them away.

To sum things up and to give you a bit of confidence in yourself, sharpening knives on stones is a skill that may not be mastered after the initial session. Don't give up! Once you grasp the technique, you'll be able to consistently maintain your knives, gradually reducing the time spent on each sharpening session, minimizing metal removal on your knife, and ensuring your knives remain chrisp-sharp all the time.
If you feel that there are aspects missing from our 101 Sharpening Basics, kindly share your insights in the comments section below. Additionally, we'd love to hear about the outcomes you achieved using these straightforward and efficient techniques. Your feedback is invaluable in enhancing our resources for a more comprehensive experience.
Thank you and Good luck!
Use this section to help customers find the products they're looking for.
Leave a comment